
Updated on 20-Aug-2026
Control crawl-space moisture with professional encapsulation in Toronto. Learn what the system includes, when it works and which repairs come first.
Table of Contents
Protect Your Home with Crawl Space Encapsulation & Sealing
Crawl-space encapsulation creates a sealed moisture-control system beneath a home. A professional installation may cover exposed soil and foundation surfaces with a reinforced vapour barrier, seal outside air openings and control remaining humidity with drainage or dehumidification.
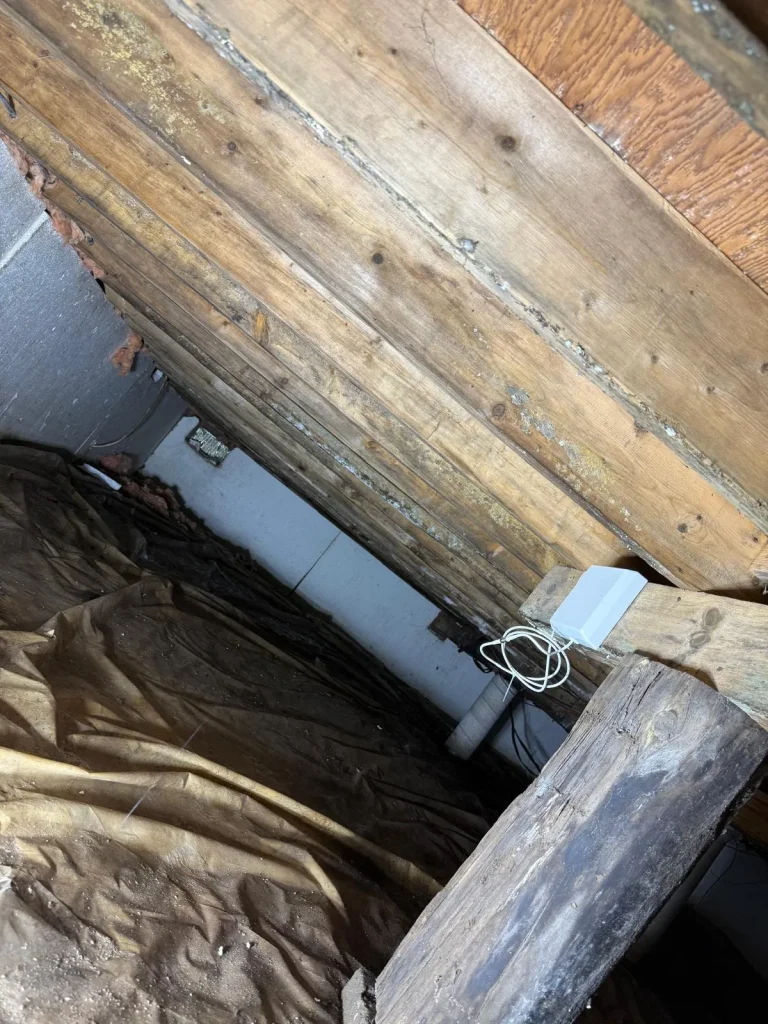
Encapsulation can help when a crawl space has damp soil, recurring condensation, elevated humidity, musty odours or mold that returned after cleanup. The installation must match the source of moisture. A membrane cannot stop an active plumbing leak, redirect groundwater or repair a damaged foundation.
A proper assessment should answer a few questions before anything gets covered:
- Where is the water or humidity coming from?
- Is mold already growing on the joists, subfloor or insulation?
- Does the crawl space contain standing water?
- Are plumbing, drainage or structural repairs required?
- How will humidity be controlled after the space is sealed?
- Will the installation affect combustion appliances, wiring or future access?
Ultimate Mold Crew assesses the crawl space as a connected part of the home. We look at moisture entry, affected materials, air movement and previous water damage before recommending encapsulation or related mold remediation.
💡 Encapsulation is often the final step after mold removal. Learn more about Crawl Space Mold Removal Toronto.
What Is Crawl-Space Encapsulation?
Crawl-space encapsulation separates the interior of the crawl space from damp soil, foundation surfaces and uncontrolled outdoor air.
A typical system may include:
- A reinforced polyethylene liner over exposed earth
- Vapour-barrier coverage along foundation walls
- Sealed seams and penetrations around posts and pipes
- Treatment of crawl-space vents and outside air gaps
- Drainage improvements where groundwater enters
- A covered sump system where site conditions require one
- Humidity monitoring
- A crawl-space-rated dehumidifier when passive control is insufficient
- Insulation changes based on how the space will function
Natural Resources Canada recommends covering exposed earth in crawl spaces with a moisture barrier and using a sump pump where excess soil moisture must be removed. These measures address different parts of the problem. The liner reduces water vapour moving upward from the ground. The drainage system manages liquid water before it collects beneath the membrane.
Encapsulation changes how the crawl space interacts with the rest of the building. The work should be planned as a system rather than treated as a sheet of plastic laid across the floor.
Encapsulation, Vapour Barriers and Waterproofing Are Different
These terms are often used as though they describe the same repair. Each one solves a different moisture pathway.
| Moisture-control method | Main purpose | What it cannot solve alone |
|---|---|---|
| Ground vapour barrier | Reduces moisture evaporating from exposed soil | Foundation leaks, plumbing failures and high residual humidity |
| Full encapsulation | Isolates the crawl space from ground moisture and uncontrolled outside air | Active water entry or existing mold contamination |
| Dehumidification | Removes moisture from crawl-space air | Standing water or water passing through the foundation |
| Interior drainage and sump pump | Collects and removes liquid water | Air leakage, exposed soil and surface condensation |
| Exterior waterproofing | Reduces water entering through the foundation | Indoor plumbing leaks or mold already growing on materials |
| Mold remediation | Removes contaminated material and settled particles | The leak or humidity condition that allowed growth |
A homeowner with a dry dirt-floor crawl space may need a different system from someone who finds water after every heavy rain. A house with condensation on cold ductwork also requires different work from a property with a cracked drainpipe beneath the floor.
Encapsulation works best after liquid water sources have been controlled.
What Causes Moisture in Toronto Crawl Spaces?
Toronto crawl spaces experience moisture from the soil, outside air, building leaks and seasonal temperature changes. Several sources may be active at once.
Exposed soil
Soil can release water vapour even when its surface does not look wet. That moisture enters the crawl-space air and can collect on colder wood, pipes or ductwork.
A continuous ground membrane reduces this vapour movement. The National Research Council of Canada identifies crawl spaces as one building condition where membranes help limit moisture transfer from the ground. NRC guidance on vapour barriers explains the role of vapour-resistant materials in controlling moisture diffusion.
Foundation seepage and surface drainage
Water may enter through foundation cracks, masonry joints or the wall-to-floor connection. Grading that directs rain toward the home can increase the amount of water reaching the foundation.
Spring thaw, heavy rainfall and blocked eavestrough drainage often reveal these problems. A liner installed over the floor does not prevent water from continuing to enter behind or beneath it.
Plumbing leaks
A slow supply-line leak, drain failure or condensation from an uninsulated cold-water pipe can keep a localized section wet. Dark staining, corrosion, saturated insulation or damp soil beneath a pipe can help distinguish plumbing moisture from broader humidity.
The plumbing repair comes before encapsulation.
Humid outdoor air
Traditional crawl-space vents can admit warm, humid air during summer. When that air reaches cooler ducts, pipes or foundation surfaces, water can condense.
Closing vents without evaluating the rest of the space can also trap existing moisture. The installer needs a plan for drainage, humidity control and safe air movement after the crawl space is sealed.
Missing or damaged insulation
Wet or fallen insulation can hold moisture against the subfloor and conceal mold growth. It may also leave the rooms above with cold floors and uneven temperatures.
Damaged insulation should be evaluated before a new liner restricts access. Encapsulation and insulation perform different jobs, although both may form part of the same project.
Signs Your Crawl Space May Need Encapsulation

A musty smell upstairs is one clue. It does not show where the moisture entered or prove that encapsulation is the only repair required.
Look for a pattern of conditions:
- Exposed soil beneath the home
- Damp earth during otherwise dry weather
- Condensation on pipes, ducts or foundation walls
- Visible mold on joists or the underside of the subfloor
- Wet, stained or hanging insulation
- Rust on metal fasteners and HVAC components
- Efflorescence on masonry
- Standing water after rain or snowmelt
- Soft, darkened or deteriorating wood
- Persistent crawl-space humidity above the target range
- Odours moving into rooms above the crawl space
- Repeated mold growth after surface cleaning
Health Canada recommends maintaining indoor relative humidity between 30% and 50%. A crawl-space hygrometer can show how conditions change over several days, although humidity readings cannot locate a hidden leak or measure the moisture content of wood.
Visible fungal growth requires separate attention. Encapsulation should not hide contaminated joists, subflooring or insulation. The affected area should first receive an appropriate crawl-space mold assessment and remediation plan.
When Encapsulation Should Wait
Encapsulation is not the first task when the crawl space contains active water entry or unresolved safety concerns.
The installation should wait when:
- Water is pooling after rain.
- A plumbing line continues to leak.
- Sewage or contaminated floodwater entered the space.
- Foundation movement or damaged supports require structural review.
- Mold remains on surfaces that the liner will cover or restrict access to.
- Wood and insulation are still wet.
- Pest activity has not been addressed.
- Electrical wiring requires repair.
- A fuel-burning appliance may be affected by changes to combustion air.
- The drainage route for a dehumidifier or sump pump has not been established.
The same building-science principle applies to encapsulation: identify the water source, complete the repair and confirm suitable drying before enclosing the space. Natural Resources Canada’s crawl-space guidance provides further detail.
A white liner can make a crawl space look finished while water continues moving underneath it. The appearance of the installation should never replace moisture diagnosis.
What Should Happen Before the Vapour Barrier Is Installed?
The pre-installation work determines how well the system performs.
Inspect the crawl space
The assessment should include the soil, walls, joists, subfloor, insulation, plumbing, ductwork, vents and access opening. Moisture meters can help compare wood and building materials. Thermal imaging may reveal temperature differences that guide a closer inspection, but it does not detect mold through a wall.
Trace the moisture source
The contractor should distinguish vapour from exposed soil, foundation seepage, plumbing leaks, condensation and surface drainage. Each source requires a specific correction.
Remove debris and damaged materials
Discarded wood, cardboard and organic debris can hold moisture and block complete membrane coverage. Wet or mold-contaminated insulation may require removal.
Complete mold remediation where required
Existing growth should be remediated before the space is sealed. Surface coatings and liners should not be used to conceal active contamination.
A professional mold inspection in Toronto may be appropriate when the musty odour persists, water damage extends into concealed areas or the condition of the framing cannot be determined safely.
Correct drainage and repair leaks
Plumbing repairs, foundation work, grading changes, sump installation or interior drainage may form part of the preparation. The required combination depends on how water reaches the space.
What Does a Complete Crawl-Space Encapsulation Include?
A complete system addresses liquid water, ground vapour, outside air and residual humidity. The scope changes with the property.
| System component | What it does | When it may be needed |
|---|---|---|
| Drainage or sump system | Collects and removes liquid water | Water enters after rain, thaw or a rising water table |
| Ground liner | Reduces vapour released from exposed soil | Crawl space has an earth or gravel floor |
| Wall membrane | Limits moisture movement from foundation surfaces | Masonry walls remain damp or form part of the sealed enclosure |
| Sealed seams and penetrations | Maintains continuity around posts, pipes and corners | Required for a complete barrier |
| Vent and air-gap sealing | Reduces uncontrolled outdoor air entry | Existing vents admit humid summer air or cold winter air |
| Dehumidifier | Removes moisture remaining in the sealed space | Humidity stays high after water sources are controlled |
| Humidity monitor | Tracks changing conditions | Useful in every sealed crawl space |
| Insulation upgrades | Controls heat flow and surface temperature | Existing insulation is wet, damaged, misplaced or insufficient |
| Service access | Allows future plumbing, electrical and HVAC work | Required wherever equipment or utilities remain accessible |
The system should still allow inspection of vulnerable areas. Covering every foundation surface without leaving access to termite inspection zones, plumbing connections or structural components can make future problems harder to detect.
How Crawl-Space Encapsulation Is Installed
The installation sequence matters. Placing a liner before mold removal, leak repair or drying can conceal the condition that caused the problem.
1. Assess moisture and material conditions
The contractor examines the floor, walls, framing, insulation, plumbing and mechanical equipment. Moisture readings help identify damp areas and determine whether wood or other materials need additional drying.
The inspection should also document:
- Crawl-space dimensions and access height
- Exposed soil and foundation materials
- Visible growth or musty odours
- Wet insulation and deteriorated wood
- Plumbing or drainage failures
- Evidence of rodents or insects
- Ductwork and fuel-burning equipment
- Existing vents and outside penetrations
- Areas that need continued access
2. Repair water entry
Foundation seepage, grading issues, plumbing leaks and groundwater require separate repairs. Standing water may call for a drainage channel, sump system or waterproofing work.
The goal is to prevent liquid water from collecting beneath or on top of the new liner.
3. Remove mold and damaged material
Mold-contaminated insulation, wood debris and other porous materials may require removal. Salvageable framing can be remediated according to its condition and the extent of growth.
Encapsulation follows remediation. It should not be used to cover visible mold.
4. Prepare the floor and perimeter
Sharp debris, loose masonry and abandoned materials are removed. Uneven ground may need preparation so the liner can sit securely without excessive stress or puncturing.
Drainage work and sump components should be installed before the floor membrane.
5. Install and seal the membrane
The liner is fitted across the ground and around columns, pipes and other penetrations. Seams are overlapped and sealed. The barrier may continue up the foundation walls as the system design requires.
Material thickness is one part of liner selection. Puncture resistance, reinforced construction, seam quality and installation around irregular surfaces also affect performance.
A thin membrane placed loosely over soil is a ground cover. A sealed liner integrated with the walls and penetrations forms part of an encapsulation system.
6. Address outside air openings
Vents and gaps are handled according to the crawl-space design. Mechanical equipment, combustion air and code requirements must be considered before changing ventilation.
A vent should not be closed simply because humid air sometimes enters through it. The contractor must establish how the sealed space will manage humidity and interact with the home.
7. Add humidity control
The crawl space is monitored after water entry and ground vapour have been controlled. A properly sized dehumidifier may be required when relative humidity remains elevated.
The unit should have a dependable drainage route. A bucket that relies on regular emptying is poorly suited to a low-access space where missed maintenance could allow humidity to rise again.
Does Every Crawl Space Need a Dehumidifier?
No. The need depends on the enclosure, drainage, temperature and measured humidity after the space is sealed.
A dehumidifier is more likely to be useful when:
- Summer humidity remains high.
- The crawl space contains cold pipes or ductwork.
- Moisture readings rise after heavy rain.
- The foundation releases residual moisture.
- Musty odours continue after repairs.
- The space has limited connection to conditioned indoor air.
- Previous mold growth was associated with elevated humidity.
A dehumidifier should control remaining airborne moisture. It should not compensate for standing water, an active foundation leak or an uncovered soil floor.
Our guide to crawl-space humidity and mold prevention explains how temperature and relative humidity work together beneath the home.
What Does Crawl-Space Encapsulation Cost in Toronto?
A full crawl-space encapsulation in Ontario commonly falls between $4,000 and $15,000 or more. A limited vapour-barrier installation may cost less. Drainage, mold remediation, damaged insulation, difficult access and structural repairs can move a project beyond the typical range.
Published Ontario pricing for 2026 places:
| Project scope | Indicative Ontario range |
|---|---|
| Vapour barrier only | $1,200 to $4,000 |
| Basic encapsulation | $4,000 to $8,000 |
| Full system with drainage, insulation or dehumidification | $7,000 to $15,000+ |
Crawl-space size
Larger spaces require more liner, sealing tape and labour. Floor area alone does not provide an accurate price.
Access and working height
A shallow crawl space may take much longer to clean, inspect and seal. Small access openings can also restrict equipment and material movement.
Existing mold
Mold remediation is a separate stage. The cost depends on the affected area, surface condition and whether insulation or other porous materials require removal.
Water entry and drainage
A relatively dry earth floor may only require vapour control. Standing water can add foundation repairs, drainage, grading work or a sump system.
Liner specification
Reinforced membranes and thicker materials generally cost more than light polyethylene. Corners, posts and numerous penetrations also increase the amount of detailing required.
Insulation condition
Wet or fallen insulation may require removal. The replacement strategy depends on whether the crawl space will remain unconditioned or become part of the enclosed building area.
Mechanical humidity control
The cost of a dehumidifier depends on capacity, drainage arrangements, controls and electrical requirements.
A useful estimate should separate mold remediation, drainage, liner installation, insulation and mechanical equipment. This allows the homeowner to see which repairs are essential and which upgrades depend on the crawl space’s final design.
Is Crawl-Space Encapsulation Worth It?
Encapsulation is worth considering when ground vapour or uncontrolled air movement creates recurring moisture beneath the home. It can make the space easier to inspect, reduce damp conditions and protect framing and insulation from repeated moisture exposure.
Its value depends on the diagnosis.
Encapsulation is more likely to be worthwhile when:
- The home has an exposed earth crawl-space floor.
- Mold returned after cleanup because humidity remained high.
- Condensation forms on framing, pipes or ductwork.
- Damp insulation repeatedly falls or deteriorates.
- Musty odours persist after leaks have been repaired.
- The space needs a coordinated drainage and humidity-control system.
A full system may offer little value when the problem comes from one repairable plumbing leak and the rest of the crawl space remains dry. The inspection should determine whether the home needs encapsulation, a ground barrier, drainage work, insulation repair or a smaller moisture correction.
Can Encapsulation Prevent Crawl-Space Mold?
Encapsulation can reduce the moisture conditions that support mold growth. It cannot guarantee that mold will never return.
Mold may develop after encapsulation if:
- A new plumbing leak occurs.
- Water enters above the membrane.
- The sump pump fails.
- The dehumidifier stops operating.
- Seams open or the liner tears.
- Wet materials were enclosed before drying.
- Existing mold was covered instead of remediated.
- Humidity is not monitored.
- Exterior drainage conditions change.
How Should an Encapsulated Crawl Space Be Maintained?
Inspect the space at least once or twice each year and after major rain, rapid snowmelt or a plumbing failure.
During the inspection, check:
- Current relative humidity
- Water on or beneath the liner
- Open seams and punctures
- Sump-pump operation
- Dehumidifier drainage and filter condition
- New plumbing leaks
- Condensation on pipes or ducts
- Musty odours
- Pest disturbance
- Changes in wood colour or moisture
- Access points disturbed by later repair work
Keep a record of humidity readings. A single measurement shows current conditions. Repeated readings reveal seasonal changes and equipment failures.
Any local plumbing contractor entering the space, wiring or HVAC work should know that the liner forms part of a moisture-control system. Cuts and lifted seams need repair after the service is complete.
Crawl-Space Encapsulation or Mold Remediation: Which Comes First?
Mold remediation comes first when active growth is present.
Remediation removes contaminated material and cleans affected surfaces. Encapsulation manages the moisture conditions that could allow new growth. Combining the two stages in the wrong order can trap wet material or hide contamination.
A practical sequence is:
- Locate the water or humidity source.
- Stop active water entry.
- Remove contaminated porous materials where required.
- Remediate salvageable surfaces.
- Dry the crawl space and verify material conditions.
- Install drainage and encapsulation components.
- Monitor humidity after completion.
Testing is not required for every visible mold problem. Inspection, moisture mapping and a defined work area may provide enough information. Sampling can help when growth is hidden, the findings are disputed or post-remediation verification is part of the project.
Frequently Asked Questions
How long does crawl-space encapsulation last?
A quality liner can remain serviceable for many years, but lifespan depends on material strength, seam quality, drainage, foot traffic and maintenance. Plumbing or HVAC work can damage the membrane. Regular inspection is more useful than treating the installation as permanent.
Can mold grow in an encapsulated crawl space?
Yes. Mold can grow if a leak develops, humidity remains elevated, wet materials were enclosed or the liner and dehumidification system are not maintained. Encapsulation reduces moisture entry but does not make the space immune to future water damage.
Can you encapsulate a crawl space with mold in it?
Active mold should be addressed before encapsulation. Covering contaminated surfaces can restrict access and leave the underlying moisture problem unresolved. Complete the remediation and drying before installing the liner.
Does a dirt-floor crawl space need a vapour barrier?
Exposed earth can release moisture into the crawl-space air. A continuous ground vapour barrier can reduce that transfer. The complete repair may also require drainage, wall coverage, sealing or humidity control.
Is crawl-space encapsulation the same as waterproofing?
No. Encapsulation controls ground vapour and air movement within the crawl space. Waterproofing and drainage control liquid water entering through the foundation or soil. A wet crawl space may need both.
Should crawl-space vents be open or closed?
The answer depends on the building design. Vents are normally sealed as part of a planned encapsulation system that also manages drainage, humidity and mechanical conditions. Closing vents without assessing the space can trap moisture.
Will encapsulation make the floors above warmer?
It may reduce cold air movement and support more stable temperatures when insulation and air sealing are designed correctly. Results depend on the floor assembly, HVAC configuration and location of the thermal boundary.
Can I use an encapsulated crawl space for storage?
Limited storage may be possible when the space remains dry and the liner is protected from punctures. Keep belongings away from plumbing equipment, inspection areas and foundation access. Avoid cardboard and other moisture-sensitive materials.
Get the Crawl Space Assessed Before Covering It
The right repair begins with the moisture source. Damp soil, a foundation leak, plumbing failure and summer condensation can produce similar signs while requiring different work.
Ultimate Mold Crew provides crawl-space mold assessment, remediation and moisture-control planning in Toronto and the GTA. We inspect the affected materials, identify visible moisture pathways and determine whether the space needs mold removal, encapsulation or another repair first.
Call 647-985-2739 to arrange a crawl-space assessment or request a free initial video consultation.
